Cavatelli Rigati Lunghi with Tomato Sauce
These cavatelli rigati lunghi are a traditional Sicilian pasta shape made from just semolina and water, rolled to create distinctive ridges that catch sauce beautifully. I learned to make them in Sicily during a cooking class on an organic farm in the mountains, where they used a chitarra, wooden frame strung with parallel wires (like guitar strings), and ridged gnocchi board to create the characteristic grooves. The ridges aren't just for show - they help the sauce cling to every piece. This is rustic pasta-making at its best, simple enough for beginners and forgiving if things aren't perfect. Served with a rich tomato sauce and plenty of parmesan, it's the kind of meal that feels special because you made it from scratch.

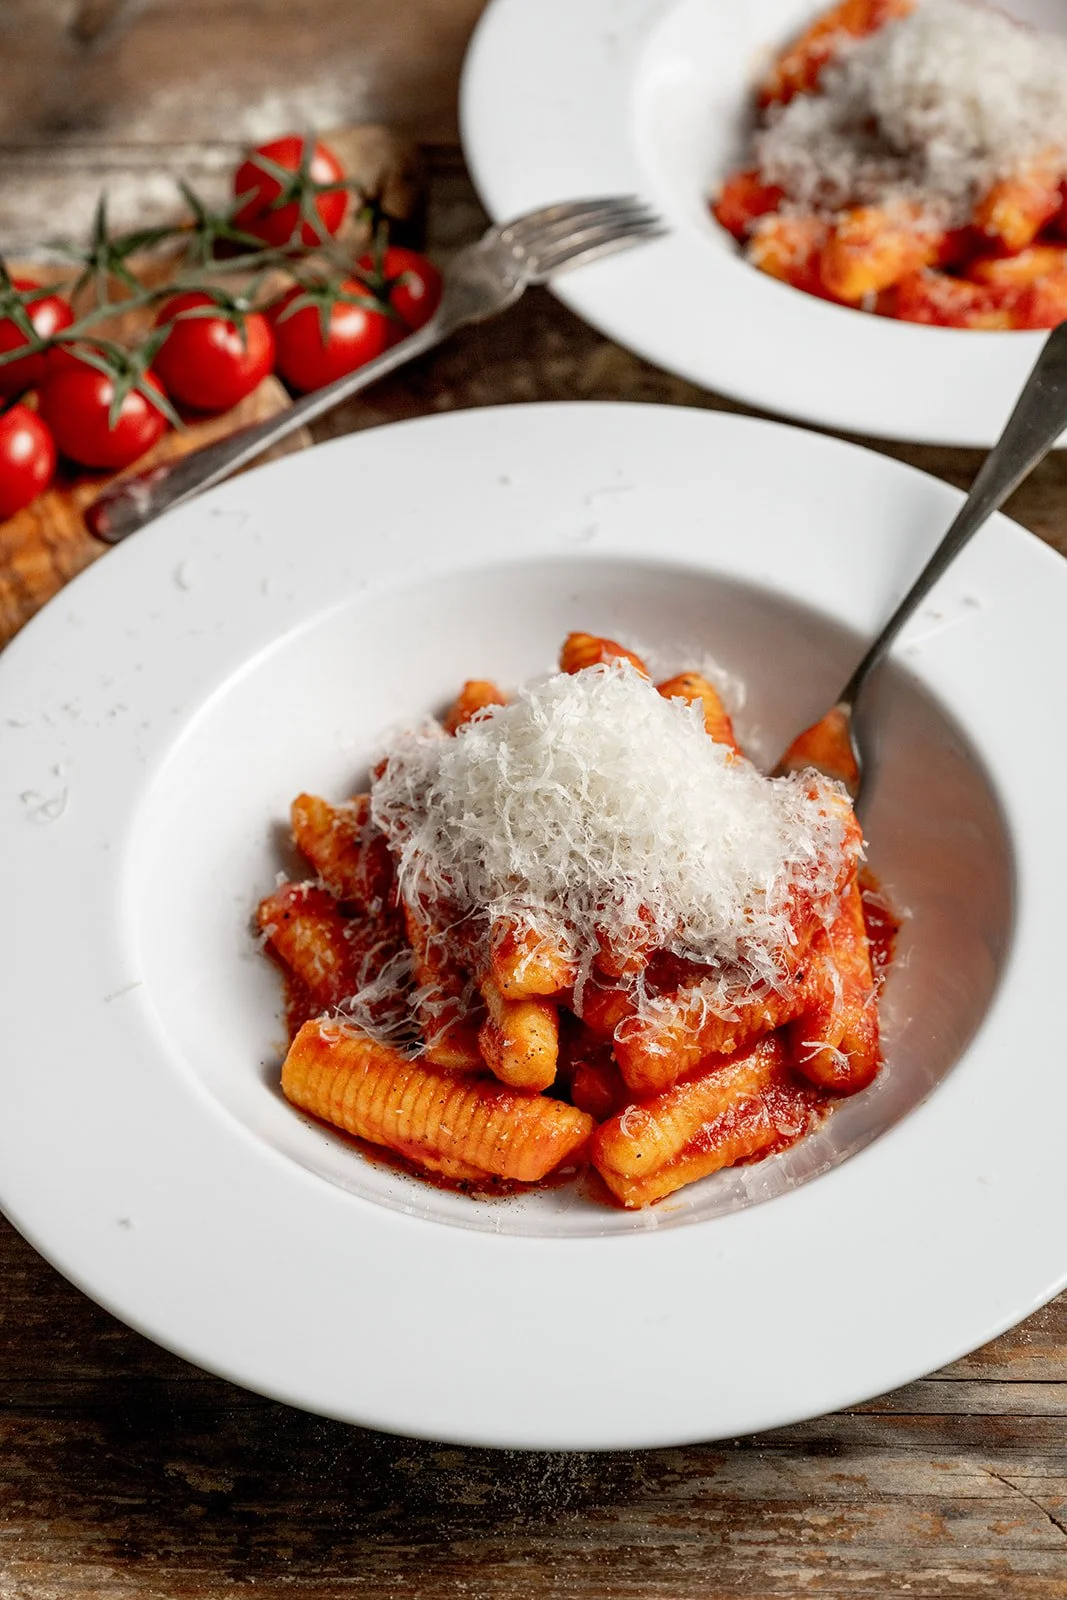
Cavatelli Rigati Lunghi with Tomato Sauce
Handmade Sicilian semolina pasta with ridges, served with rich tomato sauce and parmesan. Learn to make traditional cavatelli rigati lunghi from scratch.
Ingredients
- 500g semolina flour (fine semolina rimacinata)
- 225g warm water
- 1/2 tsp of salt
- 300 to 400ml rich tomato pasta sauce (homemade or good quality shop-bought)
- 50g parmesan, finely grated
- Salt for pasta water
Instructions
- Pour the semolina flour into a mound onto a clean work surface and use the bottom of a bowl to make a well in the middle. Add the salt to the flour.
- Pour the warm water into the well. Use a fork to start whisking, slowly and carefully incorporating the flour from the edges into the water.
- When the centre liquid becomes really thick and the fork is no longer useful, use your hands or a bench scraper to start mixing everything together until you have an even, shaggy mixture. You can also do this in a bowl if you want easier cleanup.
- Bring the dough together into a ball and start to knead. This will be messy at first but it will come together. Knead vigorously for 8 to 10 minutes until the dough comes together and has a dimpled texture.
- Wrap the dough tightly in cling film or a damp tea towel and rest for 10 minutes.
- After 10 minutes, unwrap and knead again for 3 to 4 minutes until you get a really smooth ball of dough with no cracks. The texture should be firm but pliable.
- Wrap again and rest at room temperature for at least 30 minutes or up to 3 hours.
- Unwrap the dough and divide it into 4 equal pieces with a pastry cutter or sharp knife.
- Working with one piece at a time, gently roll the dough into a long sausage shape. Start from the middle and roll with your palms rather than fingertips to get an even, smooth cylinder. You'll need a large clear work surface for this. The sausage should be 1 to 2cm thick, depending on your preference. Bear in mind the pasta puffs up when boiled, so don't roll it too thick.
- Dust your work surface lightly with 00 flour if the dough starts to stick.
- Cut the rolled dough into pieces about 3 to 4cm long. These are cavatelli rigati lunghi (long cavatelli), so they're meant to be longer than standard cavatelli.
- Lightly dust your gnocchi board (or fork, or the back of a cheese grater) with semolina to prevent sticking.
- Place each piece of dough on the ridged surface and use the back of a butter knife to gently roll it along the ridges, pressing down lightly. This creates the characteristic grooves. The dough will curl slightly as you roll.
- As you finish each piece, place it on a semolina-dusted tray or board in a single layer. Don't stack them or they'll stick together.
- Dust the finished pasta lightly with more semolina to keep the pieces separated.
- These are best cooked immediately. If you must wait, lay them in a single layer on a heavily semolina-dusted tray and use within 1 to 2 hours. They will start to sag and stick together even with dusting, so don't plan to store them long-term.
- Place a large wide pan over low heat and add the tomato sauce. Warm gently while the pasta cooks - you don't want it to catch or reduce, just gently heat through on a gentle heat.
- Bring a large pot of well-salted water to a rolling boil. Don't add oil to the water - this is a myth and actually prevents the sauce from coating the pasta properly. Just salt is fine.
- Gently lower the pasta shapes into the boiling water. They may sink initially - give them a gentle stir after a minute to make sure they're not sticking to the bottom.
- Simmer for 7 to 10 minutes if the pasta is 1.5 to 2cm thick (like in the photos), or 3 to 5 minutes if rolled thinner to 0.5-1cm. The pasta is done when it floats to the surface and is tender but still has a slight bite (al dente). Taste a piece to check.
- Using a slotted spoon, lift the pasta directly from the cooking water into the pan with the warmed tomato sauce. Don't drain through a colander - you want some of the starchy pasta water to come with the pasta as it helps the sauce bind and coat properly.
- Toss the pasta gently in the sauce over low heat for 1 to 2 minutes so the pasta absorbs the flavour and the sauce coats each piece evenly. If the sauce looks too thick, add a splash of the pasta cooking water to loosen it.
- Serve immediately in warmed bowls with a generous grating of fresh parmesan over the top.
Nutrition Facts
Calories
521Fat
5 gSugar
3 gProtein
21 gCarbs
96 gApproximate values per serving


Ingredients and Sourcing Tips
Semolina flour
Use fine semolina rimacinata (twice-milled semolina) for the smoothest dough. Regular semolina works too but gives a slightly grainier texture. Don't use coarse semolina or semolina flour meant for puddings - you want pasta-grade semolina from Italian delis or the pasta section of supermarkets. Brands like Caputo or De Cecco are good.
Water temperature
Warm water (not hot, not cold - about body temperature) helps the semolina absorb more easily and makes the dough easier to knead. Too hot and it will cook the flour, too cold and it won't hydrate properly.
Tomato sauce
Use a rich, good quality tomato pasta sauce. Homemade is ideal - a simple sauce made from tinned San Marzano tomatoes, garlic, olive oil and basil works beautifully. Roasted tomato sauce is also excellent here, with the caramelised sweetness complementing the nutty semolina pasta. If using shop-bought, choose one with minimal ingredients and no added sugar. You want a sauce that tastes of tomatoes, not sweetness.
Parmesan
Use proper Parmigiano-Reggiano and grate it fresh. Pre-grated parmesan doesn't coat the pasta in the same way and lacks flavour. 50g is plenty for 4 people - you want to taste the pasta and sauce, not just cheese.
Equipment
A gnocchi board (rigagnocchi) creates the best ridges, but a fork works in a pinch. Hold the fork tines-up and roll the pasta along them. Even the back of a metal cheese grater works. The ridges don't need to be perfect - they just need to be there to catch the sauce.
Variations and Dietary Swaps
Different sauces
While tomato sauce is classic, these ridged pastas work brilliantly with hearty meat ragù, simple garlic and olive oil (aglio e olio), pesto, or even a creamy mushroom sauce. The ridges catch anything you throw at them.
Vegan version
Skip the parmesan or use nutritional yeast for a cheesy flavour without dairy. The pasta itself is already vegan.
Gluten-free
This recipe won't work with gluten-free flour as semolina pasta relies on gluten for structure. For gluten-free fresh pasta, you'd need a completely different recipe with eggs and gluten-free flour blend.
Adding herbs
Knead finely chopped fresh herbs (basil, oregano, or parsley) into the dough after the first rest for herb-flecked pasta.
Different shapes
Use the same dough to make standard cavatelli (shorter, 1 to 2cm pieces), orecchiette (pressed with your thumb instead of rolled), or even simple malloreddus.
Kitchen Notes
Kneading semolina dough
Semolina dough is much firmer and drier than egg pasta dough. It takes serious elbow grease to knead - don't give up when it feels tough and crumbly. Keep kneading and it will come together into a smooth, pliable dough. If it's genuinely too dry and won't come together after 5 minutes of kneading, add water 1 teaspoon at a time.
Resting is essential
Don't skip the resting time. The rest allows the semolina to fully hydrate and the gluten to relax, making the dough much easier to roll and shape. Without it, the dough will fight you and spring back.
Rolling thickness
The pasta puffs up significantly when it cooks, so if you roll it to 2cm thick, expect it to nearly double in size. For more delicate pasta, roll to 1cm. Thicker pasta (1.5 to 2cm) is more rustic and substantial, closer to dumplings.
Creating ridges
Press firmly but not aggressively when rolling the pasta along the ridged board. You want clear grooves but you don't want to flatten the pasta completely. The dough should curl slightly as you roll it.
Don't overload the pan
Use your largest pan or cook the pasta in batches if necessary. Overcrowding the pot will lower the water temperature and make the pasta cook unevenly and stick together.
No oil in pasta water
This is a common myth. Oil doesn't prevent sticking (stirring does), and it actually coats the pasta so the sauce slides off instead of clinging. Just use well-salted water and stir occasionally.
Timing
Fresh semolina pasta cooks much faster than dried pasta. Start checking at 3 minutes for thin pasta, 7 minutes for thick. It should be tender but still have a slight bite.
Using pasta water
The starchy pasta cooking water is liquid gold. It helps emulsify the sauce and makes it cling to the pasta. Always save a mugful before draining (or in this case, lift the pasta out with a slotted spoon so the water comes with it).
Rustic is good
This is rustic pasta. The shapes don't need to be identical or perfect. Slight variations in size and shape are part of the charm and authenticity.
Serving Suggestions
How to serve
Serve in warmed wide shallow bowls so the pasta and sauce sit in a single layer rather than piling up. This way every piece gets evenly coated. Grate fresh parmesan over the top at the table and add a drizzle of good olive oil if you like.
What to serve alongside
This is substantial enough to be a main course on its own. Serve with a simple green salad dressed with lemon and olive oil, or some crusty bread for mopping up sauce. A glass of red wine (Chianti or Nero d'Avola) pairs beautifully.
When to serve
This is perfect for weekend cooking when you have time to make pasta from scratch. It's impressive enough for dinner parties but comforting enough for a family meal. The hands-on time is actually quite short - most of the time is resting.
Presentation
The pasta itself is beautiful - the ridges catch the light and the rustic, handmade quality is part of the appeal. Keep the presentation simple and let the pasta be the star.
Portion sizes
This serves 4 people as a main course. The portions are generous and filling thanks to the semolina.
Temperature
Serve hot, straight from tossing in the sauce. Fresh pasta doesn't hold heat as long as dried, so eat it immediately.